Weekly Unreal 1
This week’s project was a car configurator so I bought a Dodge Challenger model of decent quality at 1.8M polygons. I wanted to use ray traced distance field shadows (I love the proper penumbra) so I spent two days making the car parts more signed distance fields (SDF) friendly.
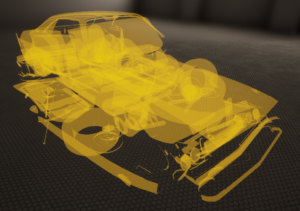
Calculating the SDF for a mesh involves a voxelization step. The voxel volume is always a cube encompassing the mesh so long or thin and flat meshes don’t play nice and might not show up at all even at the highest SDF resolution. So I went through the bigger car parts and started splitting up meshes.
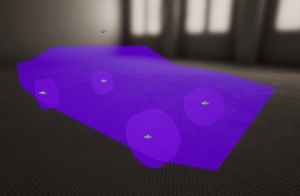
By default the side mirrors were in a single mesh item which would have needed a big voxel volume, an approximation of which you can see on the left. By splitting them into two, smaller meshes each gets their respective, smaller volume where the voxels can represent them more closely.
Some of the bigger shells produced really nasty shadows because the SDF calculation has a tough time with thin, non-watertight meshes. I thickened the worst offenders and cleaned up the any degenerate polygons in the result.
Thin parts like the antenna, small meshes like dashboard buttons and transparent surfaces have their shadows turned off entirely.
I ended up with 412 meshes which I transferred to Unreal as separate assets. Placing them in the scene was easy since every mesh had their pivot at the origin. Then I checked the shadows and maxed out the SDF resolution in the 40-ish most visible assets while turned off shadows for meshes which were clearly too small to matter.
The next step was assigning materials: I used the Automotive Materials pack and modified the base material to support the decal on the chassis. (So I didn’t use actual decal actors.)
The main light is a point light with a 4 meter “Source length” casting distance field shadows. Bellow the floor are 4 (also elongated) point lights, without shadows casting, mimicking bounce light. They flicker randomly when the light is turned on.
The rest of the illumination (and reflection) comes from the skylight.
All the “game logic” was implemented in Blueprints. To speed things up I migrated a bunch of assets from my older pet projects: material and BP utility functions, helper meshes and base materials.
For the exploded view first I gather bounding box size and center for each car part (every mesh has their pivot at the origin). The origin and the bounding box center gives a direction vector on which I move the pieces. The distance they are offset depends on the longest side of their bounding box, so smaller pieces fly farther.
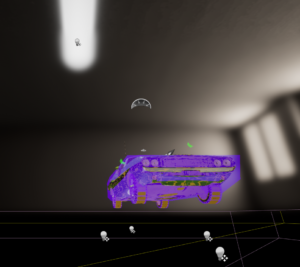
To make the car bounce I created very simple proxy meshes for the chassis and the wheels to act as rigid bodies. I attached the related car parts to them along with a thruster actor near the hood, pushing the front of the car on keypress. Constraints keep the wheels in place and prevent the chassis from tilting too much.
The car falling apart is actually a skeletal animation: The entire car was simulated in Houdini and exported using the RBD_to_FBX node in the excellent Game Dev Tools. In Unreal the invisible skeletal mesh is on top of the car and the static mesh actors are attached to the similarly named bones in Blueprints the third time the car bounces.


